See This Report about Fence Company Raleigh
Wiki Article
Fascination About Fence Company Raleigh
Table of ContentsThe Buzz on Deck Company RaleighDeck Company Raleigh Can Be Fun For EveryoneThe Best Guide To Deck Builders Near MeSome Of Fence Company Near MeFence Company Raleigh Things To Know Before You Get ThisThe Only Guide for Deck Builders Near Me
Cedar fencing pickets with stress dealt with articles will last the lengthiest. The trick to a lengthy lasting fence is using pressure dealt with wood blog posts and also rails along with cedar fence pickets.
When you don't pay a contractor, you save that amount and just pay material costs. You can absolutely build a fence yourself. This actually isn't also tough and also is rather uncomplicated. There aren't a great deal of actions to developing a fencing and the procedure isn't really complex. It's very simple to study and also get the job done properly.
Deck Builders for Beginners
If you don't seal the cedar fencing will fade to grey over an extended period of time. When installed appropriately a cedar fence can last in between 15 and also thirty years. You must use deck screws on your wood fencing. These are made to be made use of outdoors and also will certainly stand up to the severe weather condition as well as won't rust.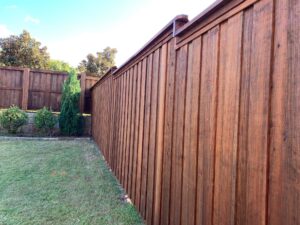
Remove any big rocks as well as stones you find in the ground. If you come across a large rock that is not able to be removed from the ground, keep analysis because we included a video below everything about how to establish a fence message in rock. It assists to have an additional set of hands for this step.
10 Easy Facts About Deck Builders Described
The other person will certainly function on filling the hole with concrete. After your message openings are dug, you can add your blog post in the middle of the hole. The various other person will after that pour in the dry concrete mix. Fill up the opening with the concrete blend to 3-4 inches below the ground level.
You can use your shovel to manually mix the cement mix as well as water in the red. Before the concrete solidifies, see to it your message is nice and straight by utilizing a degree. Once it is right, support it to the ground with landscape stakes screwed into the fence message. As you remove your fence article openings, you may run into some rocks as well as stones.
Nevertheless, you might face a stone so large that it is incapable to be gotten rid of from the ground. This is what took place to us in our yard.?.!! Below's the basic procedure: Pierce a large opening in the rock base where you wish to fence message to go. Clear out the hole by blowing pressed air right into the hole.
The Ultimate Guide To Fence Company
Establish post support into hole right away and also see to it it's straight. Let sticky dry/cure. Add a knockout post fencing message right into support as well as screw into area. Backfill staying location of the hole with concrete as well as water. Combine with shovel and let completely dry. As soon as your concrete has actually had time to completely dry (inspect your bag's directions for appropriate dry time), you can start attaching every one of the articles as well as add your rails.We placed the lower rail concerning 8 inches from the ground, the leading rail concerning 8 inches from the top of the fencing and also the other one in the center of the top and bottom rails. Step and mark your very first fence article and screw the rail brackets into area on the messages.
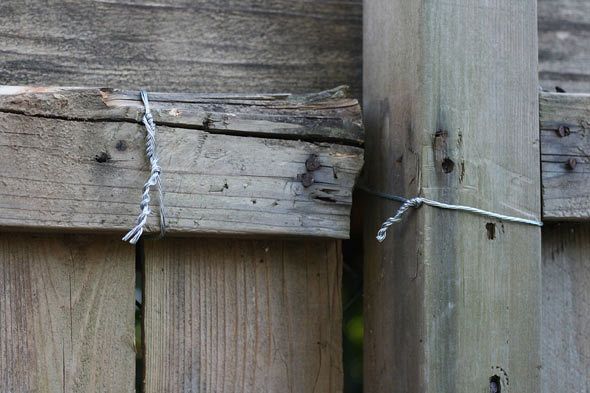
Lay out your pickets along your fence and also begin screwing them in one by one. Some individuals make use of nails but your fence will certainly last a great deal longer with look what i found screws.
5 Simple Techniques For Fence Company Raleigh
You don't require to mount the pickets with any kind of spaces in between them. Relying on your fencing format, you might intend to add a wood entrance to your fencing. We added one near the front lawn so you can easily access the yard with the side gateway. This is handy so we can quickly get our grass mower from the yard shed and also into the front yard to trim the grass.Mark your fence blog post places (8 feet apart)Dig blog post opening with message opening miner. Address least 2 feet down and also 12 inches broad for a 6 ft fence, which will certainly utilize 8 ft blog posts. You desire all-time low 2 ft to be in ground. Set fencing messages with cement.
Connect fencing pickets with 6 screws on each picket (2 at each rail)Build gateway (if required). We summed up the entire procedure of developing eviction in a different video clip as well as post, so be certain to examine that out here. As you dig out your fence post holes, you might encounter some rocks and also stones.
The smart Trick of Deck Company Raleigh That Nobody is Discussing
However, you might encounter a boulder so huge that it is not able to be eliminated from the ground. This is what took place to us in our yard! We summed up the whole process in this You, Tube video. Drill a huge opening in the rock base where you intend to fence post to go.Load click hole with epoxy/acrylic anchoring adhesive we utilized this. Establish post support into hole quickly and ensure it's straight. Allow glue dry/cure. Add fence message right into support as well as screw into location. Backfill continuing to be location of the hole with concrete as well as water. Mix with shovel and let dry.
Report this wiki page